Membuat Aplikasi Android Sistem Informasi DesaKu - Part 19
Aplikasi Android Sistem Informasi Desaku ini merupakan Tutorial Part 19, jadi jika anda belum mengikuti [/membuat-aplikasi-android-sistem-informasi-desaku-part-17/]Tutorial Part 18 [/membuat-aplikasi-android-sistem-informasi-desaku-part-18/…
Aplikasi Android Sistem Informasi Desaku ini merupakan Tutorial Part 19, jadi jika anda belum mengikutiTutorial Part 18 diharapkan anda untuk mengikuti Tutorial Part 18 dahulu untuk memudahkan anda dalam memahami Tutorial Part 19 ini.
Pada Tutorial Part 18 sebelumnya kita telah menambahkan perubahan code dan membuat aplikasi pada file Tambah_Artikel_DesaKu.js kemudian kita juga telah melakukan testing langsung melihat hasil dari perubahan code ke aplikasi android dengan menjalankan server debug. Pada Tutorial Part 19 ini kita akan melakukan perubahan code pada file Admin_Suara_DesaKu.js
Baiklah sekarang buka folder project yaitu DesaKu dengan menggunakan Visual Studio Code
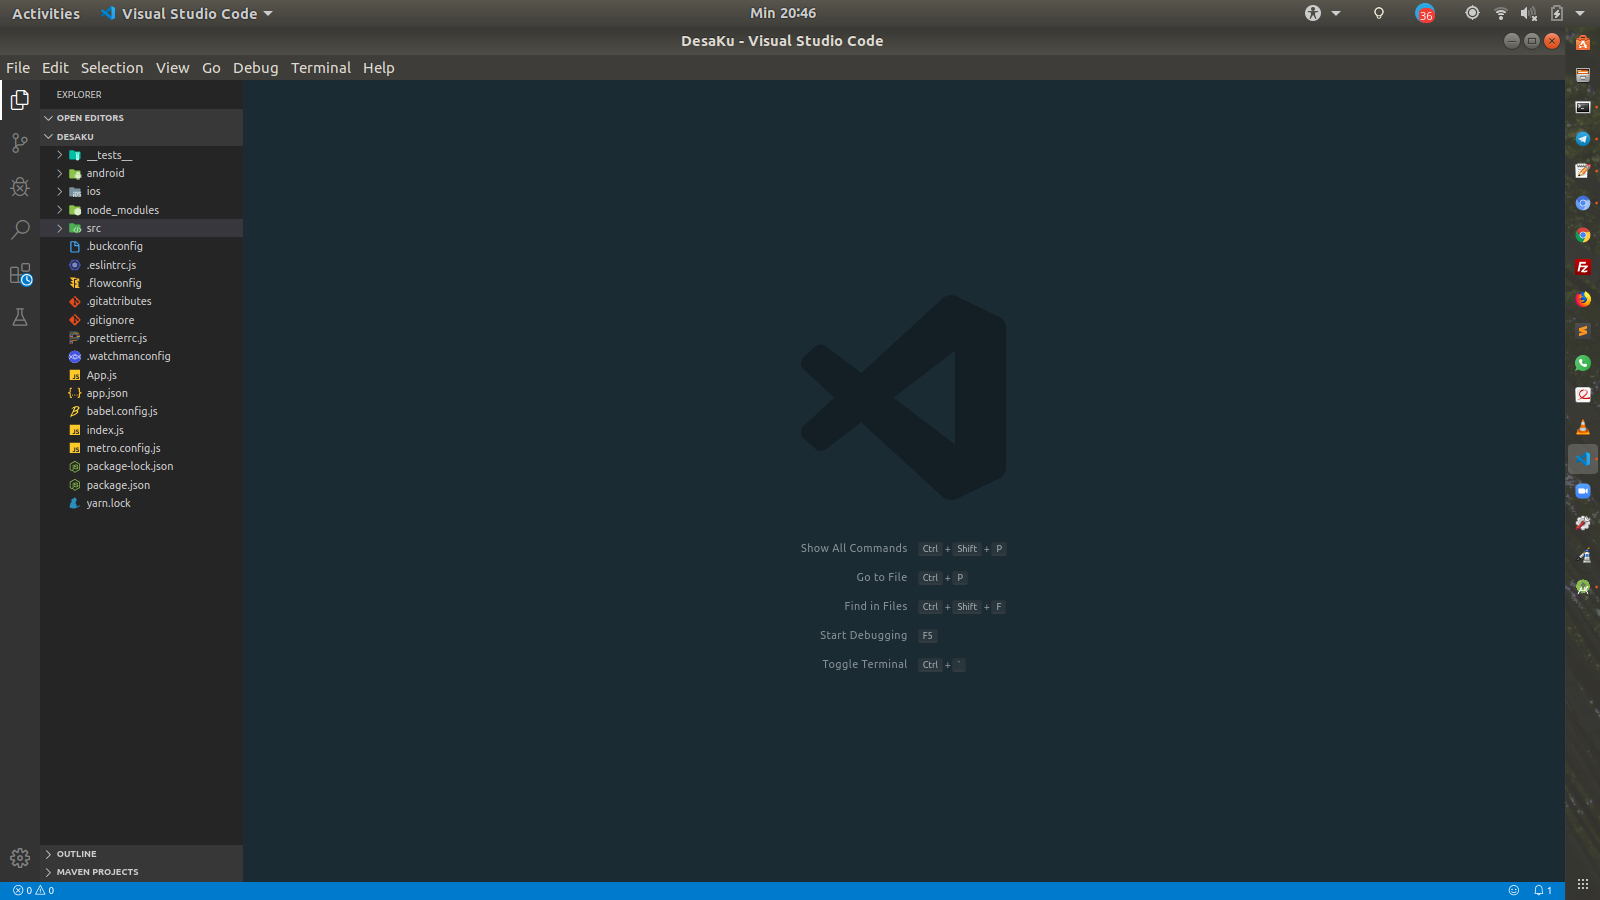
Project DesaKu
Sekarang buka file Admin_Daftar_DesaKu.js yang ada di folder src/screen/page .
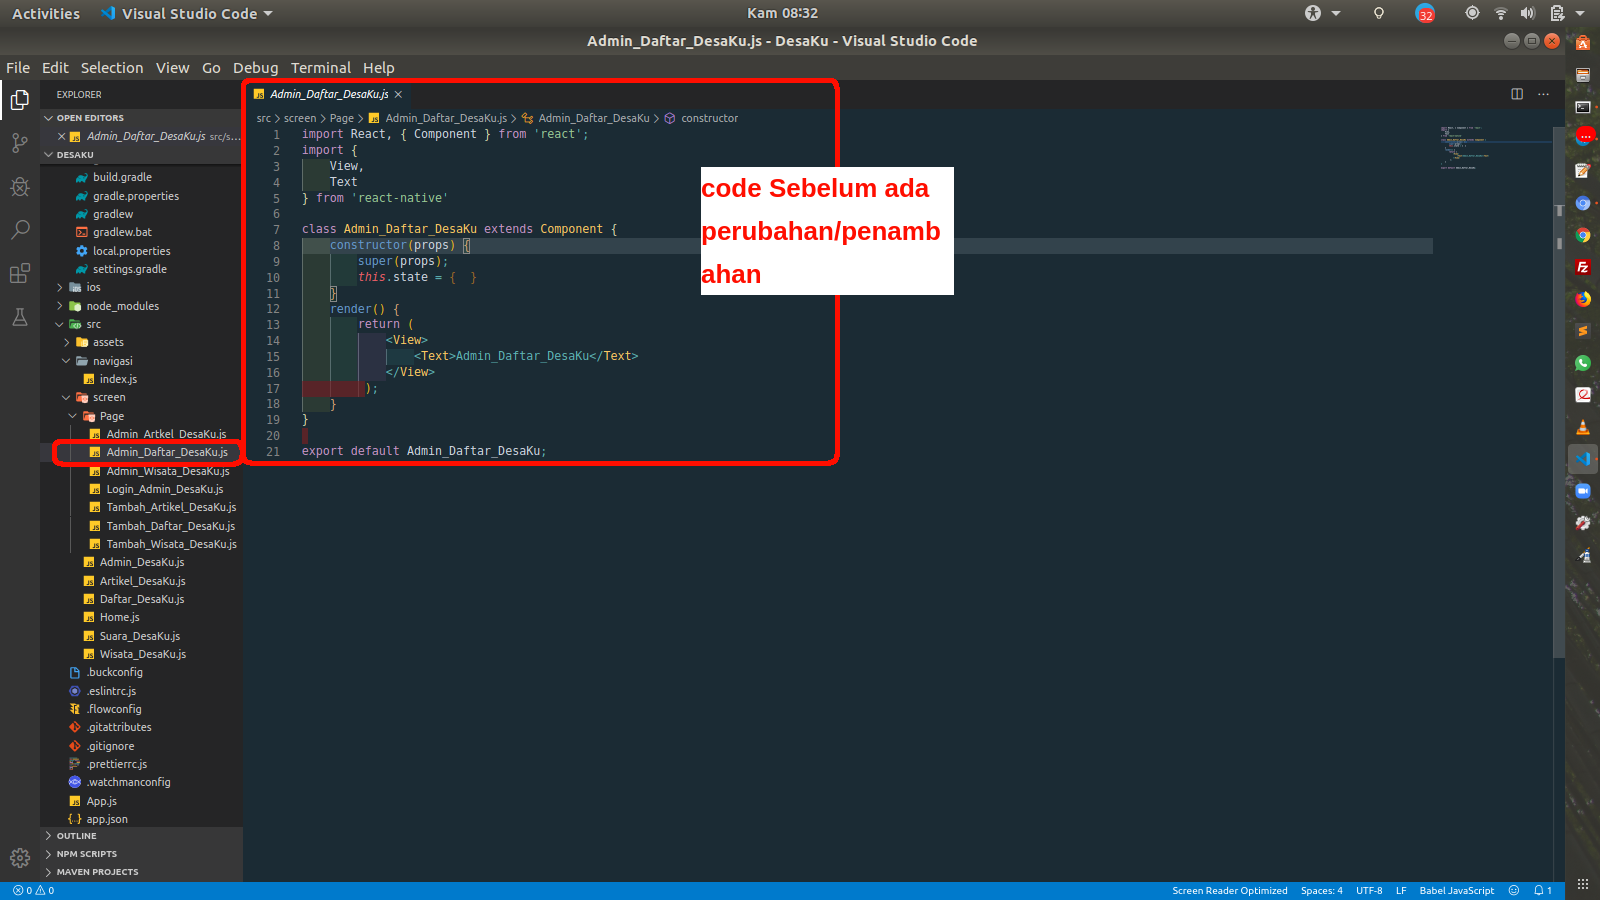
Admin Daftar DesaKu
Kemudian sekarang lakukan perubahan code pada code import component dari react-native , import library dan penambahan code pada constructor.
- Import Component
import {
    View,
    Text,
    StyleSheet,
    Image,
    StatusBar,
    YellowBox,
    TouchableOpacity,
    FlatList,
    ActivityIndicator,
    RefreshControl,
    Linking,
    TextInput,
    PixelRatio,
    ScrollView,
    AsyncStorage
} from 'react-native'
Import Component
- Import Library
import ActionButton from 'react-native-action-button';
import Icon from 'react-native-vector-icons/MaterialIcons';
import Modal from 'react-native-modalbox';

import ImagePicker from 'react-native-image-picker';
import RNFetchBlob from 'rn-fetch-blob';
Import Library
- Penambahan code pada constructor
 constructor(props) {
        super(props);
        this.state = {
            data: [],
            isLoding: true,
            refreshing: false,
            isOpen: false,
            isDisabled: false,
            swipeToClose: true,
            sliderValue: 0.3,
            ImageSource: null,
            data: null,
            nama_desaku: '',
            lokasi_desaku: '',
            photo_desaku	: '',
            maps_desaku : ''
        }
    }
Penambahan code pada constructor
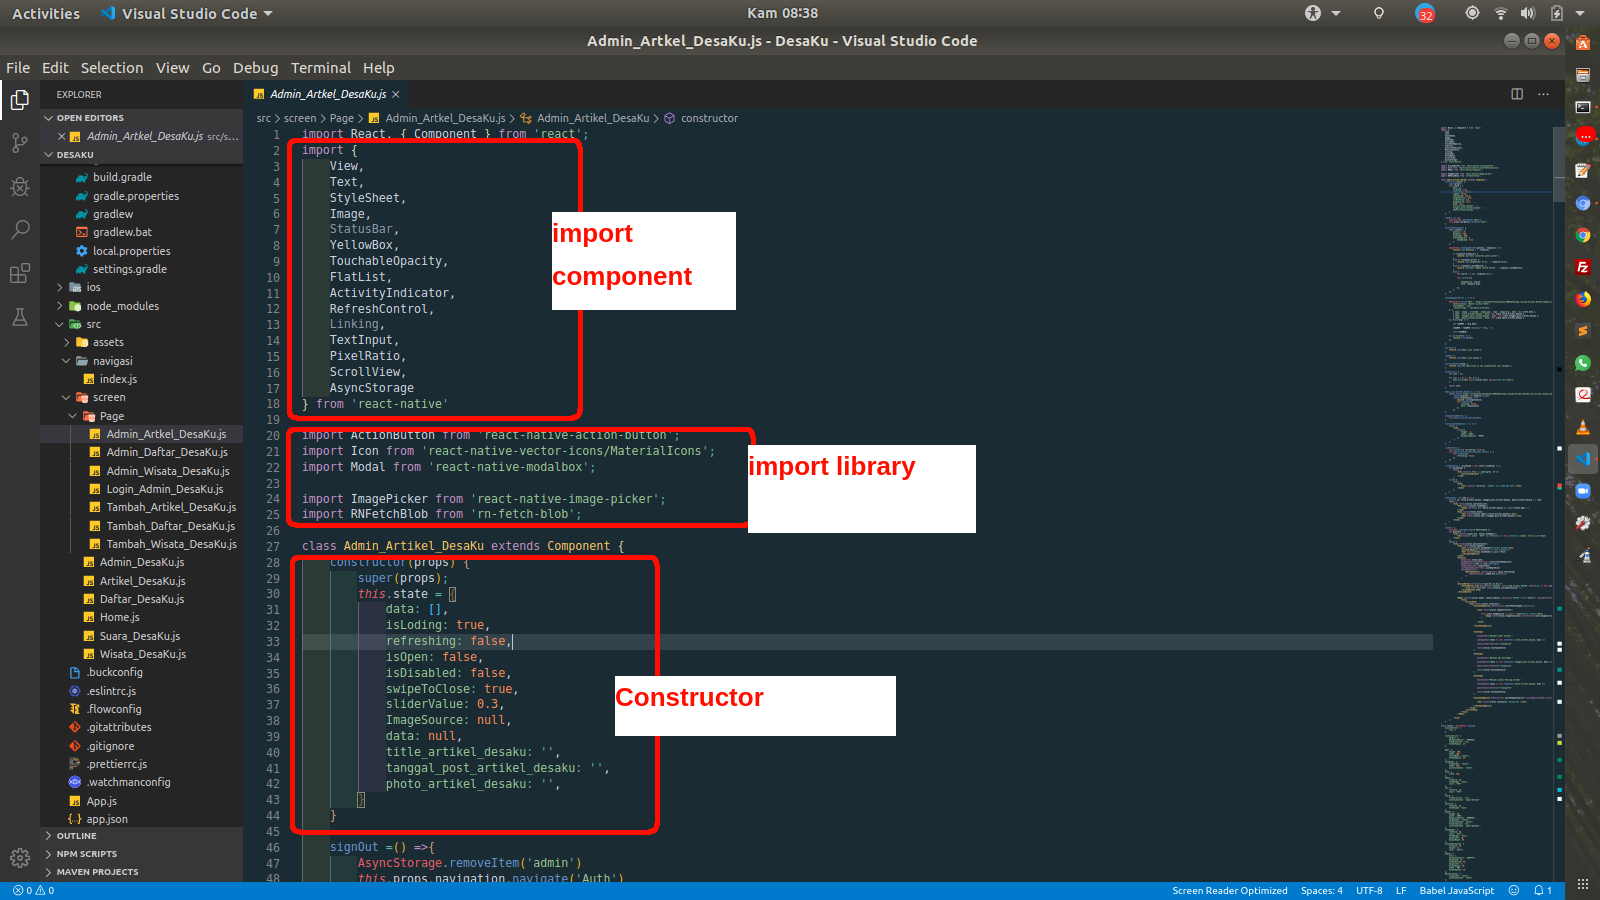
Perubahan code
Kemudian tambahkan kedua function berikut ini setelah constructor
signOut =() =>{
        AsyncStorage.removeItem('admin')
        this.props.navigation.navigate('Auth')
    }

    selectPhotoTapped() {
        const options = {
            quality: 1.0,
            maxWidth: 500,
            maxHeight: 500,
            storageOptions: {
                skipBackup: true
            }
        };

        ImagePicker.showImagePicker(options, (response) => {
            console.log('Response = ', response);

            if (response.didCancel) {
                console.log('User cancelled photo picker');
            }
            else if (response.error) {
                console.log('ImagePicker Error: ', response.error);
            }
            else if (response.customButton) {
                console.log('User tapped custom button: ', response.customButton);
            }
            else {
                let source = { uri: response.uri };

                this.setState({

                    ImageSource: source,
                    data: response.data

                });
            }
        });
    }
Function logout dan ImagePicker
Setelah itu tambahkan code function berikut ini setelah function ImagePicker.
 uploadImageToServer = () => {

        RNFetchBlob.fetch('POST', 'https://sisteminformasidesaku.000webhostapp.com/api/Daftar_DesaKu/tambah_daftar_desaku.php', {
            Authorization: "Bearer access-token",
            otherHeader: "foo",
            'Content-Type': 'multipart/form-data',
        }, [
            { name: 'image', filename: 'image.png', type: 'image/png', data: this.state.data },
            { name: 'nama_desaku', data: this.state.nama_desaku },
            { name: 'lokasi_desaku', data: this.state.lokasi_desaku },
            { name: 'photo_desaku', data: this.state.photo_desaku },
        ]).then((resp) => {

            var tempMSG = resp.data;

            tempMSG = tempMSG.replace(/^"|"$/g, '');

            alert(tempMSG);

        }).catch((error) => {
            console.error(error)
        })

    }
Upload Image To Server
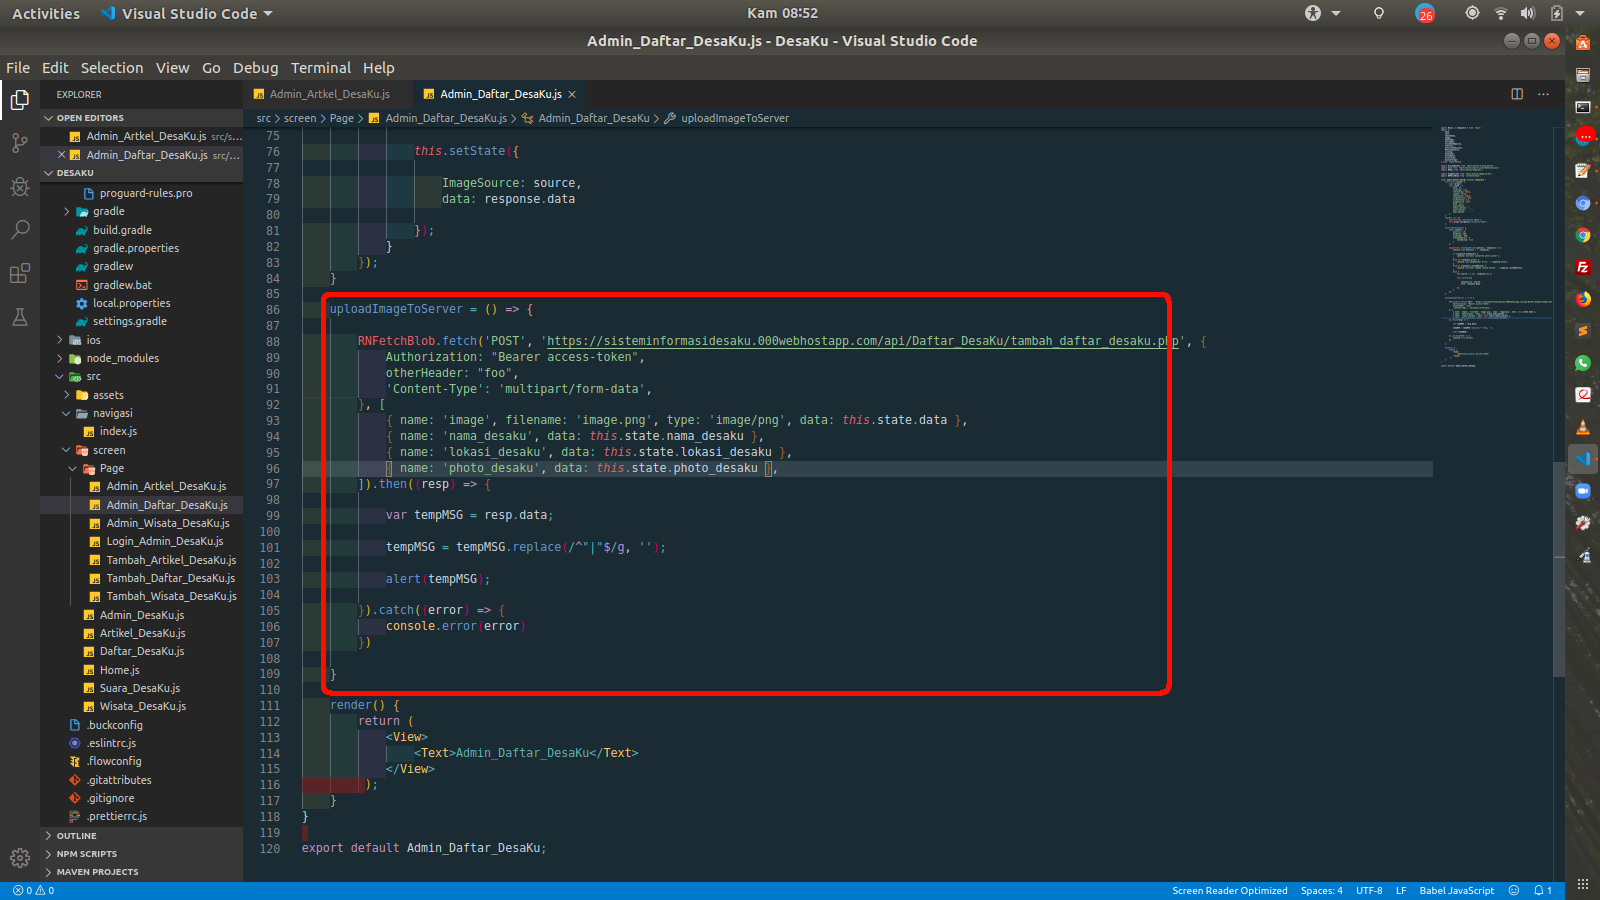
Upload Image To Server
Kemudian tambahkan function setelahnya berikut ini.
onClose() {
        console.log('Modal just closed');
    }
    onOpen() {
        console.log('Modal just opened');
    }
    onClosingState(state) {
        console.log('the open/close of the swipeToClose just changed');
    }
    renderList() {
        var list = [];
        for (var i = 0; i < 50; i++) {
            list.push(<Text style={styles.text} key={i}>Elem {i}</Text>);
        }
        return list;
    }

    Admin_List_Daftar_DesaKu = () => {
        return fetch('https://sisteminformasidesaku.000webhostapp.com/api/Daftar_DesaKu/list_daftar_desaku.php')
            .then((response) => response.json())
            .then((responseJson) => {
                console.log(responseJson)
                this.setState({
                    isLoding: false,
                    data: responseJson
                })
            })
    }
Tambahkan Function
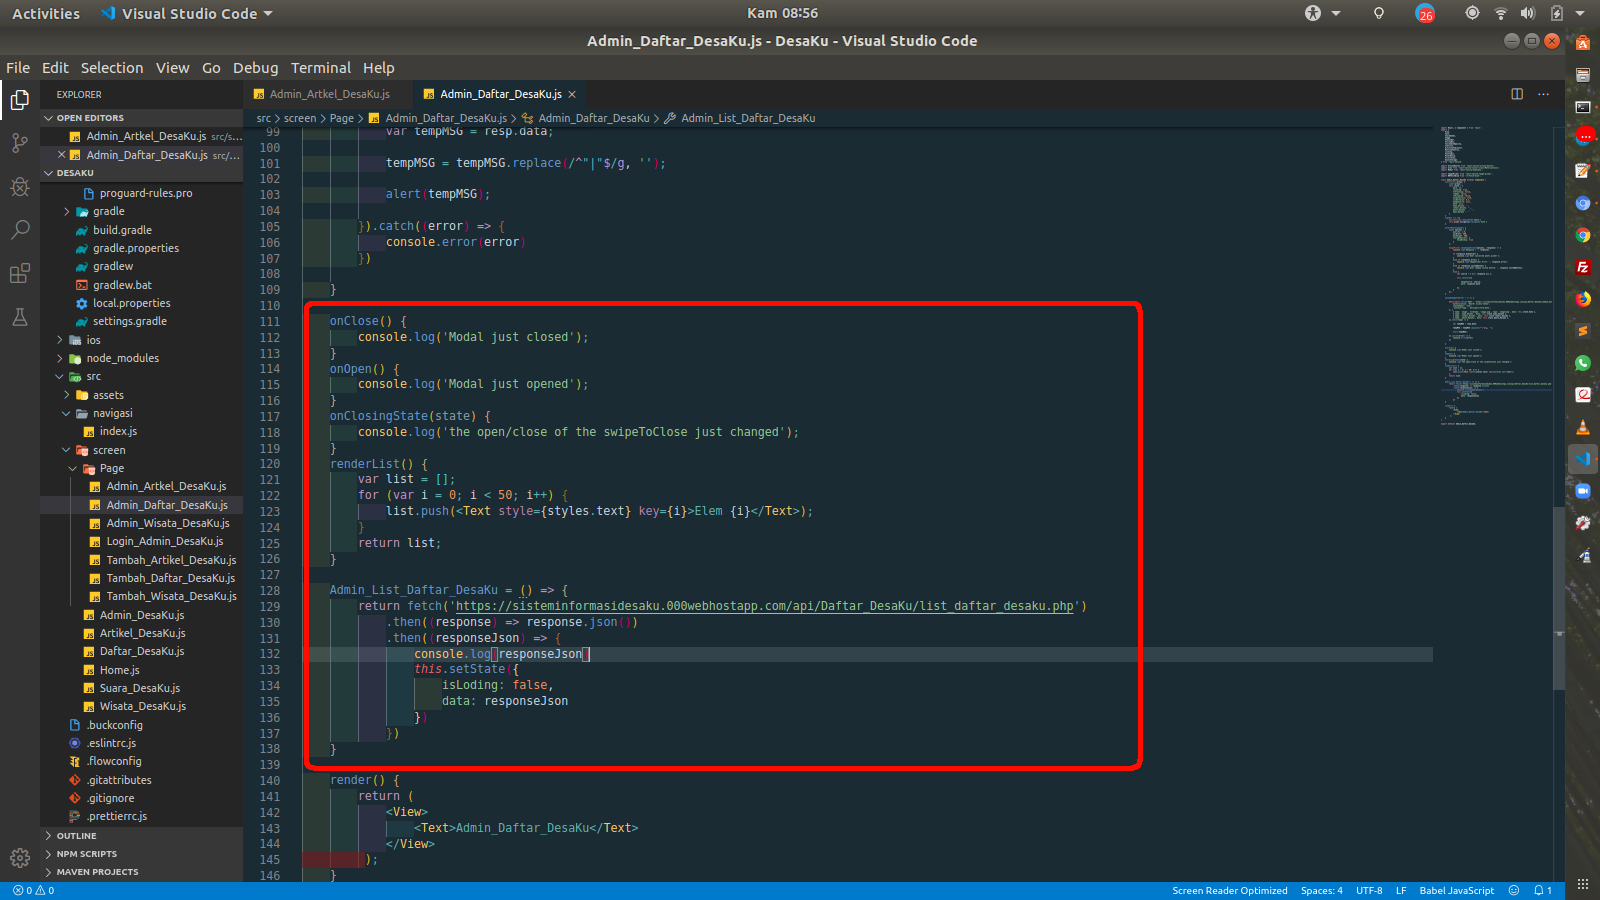
Tambahkan Function
Kemudian tambahkan lagi function setelahnya berikut ini.
  componentDidMount() {
        this.Admin_List_Daftar_DesaKu()
    }

    FlatListItemSeparator = () => {
        return (
            <View
                style={{
                    height: .5,
                    width: "100%",
                    backgroundColor: "#000",
                }}
            />
        );
    }

    _onRefresh() {
        this.setState({ refreshing: true });
        this.Admin_List_Daftar_DesaKu().then(() => {
            this.setState({
                refreshing: false
            })
        })
    }

    ListEmptyView = (isLoading = this.state.isLoading) => {
        if (isLoading) {
            return (
                <View style={{ flex: 1, paddingTop: 20 }}>
                    <ActivityIndicator />
                </View>
            );
        } else {
            return (
                <View>
                    <Text style={{ textAlign: 'center' }}> Tidak Ada Data.</Text>
                </View>
            );
        }
    }
Tambahkan Function
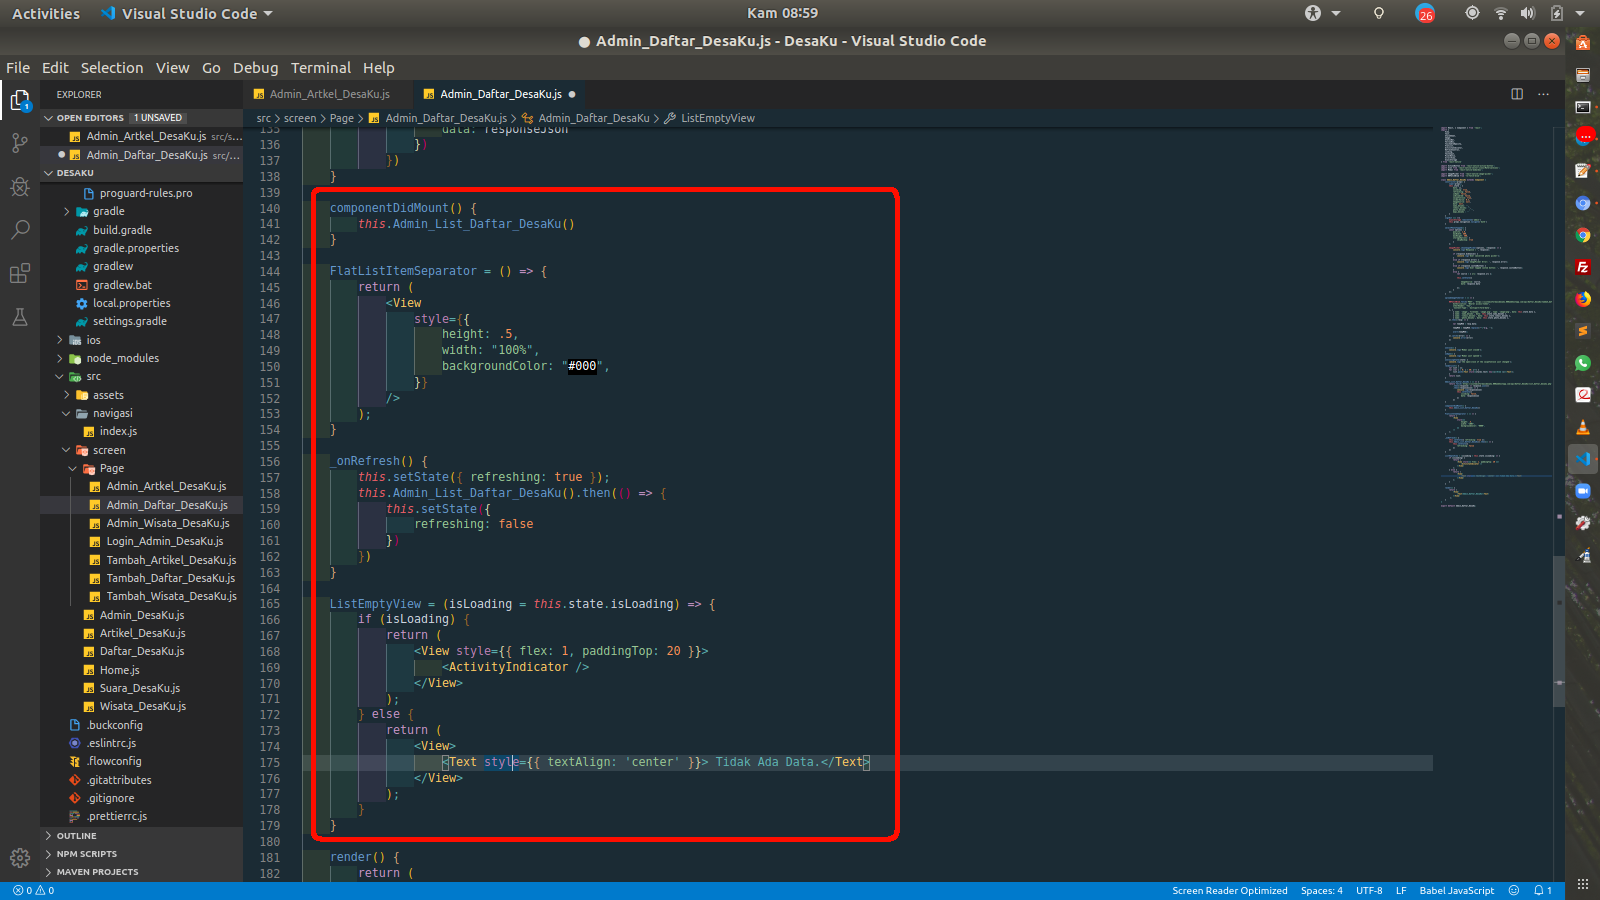
Tambahkan Function
Dan Tambahkan function renderItems
    renderItems = ({ item }) => {
        const { id, nama_desaku, lokasi_desaku, photo_desaku, maps_desaku } = item
        return (
            <View style={styles.containerList}>
                <View style={styles.conGambar}>
                    <Image source={{ uri: photo_desaku }} style={styles.gmbr} />
                </View>
                <View style={styles.note}>
                    <Text style={styles.Judul}>{nama_desaku}</Text>
                    <Text style={styles.tgl}>{lokasi_desaku}</Text>
                    <Text style={styles.tgl} onPress={() => Linking.openURL(maps_desaku)}>Petujuk Arah</Text>
                </View>
            </View>
        )
    }
renderItems
Kemudian lakukan perubahan pada render dan retrun seperti code dibawah ini.
render() {
        YellowBox.ignoreWarnings(['RNFetchBlob']);
        var BContent = (
            <View style={[styles.btn, styles.btnModal]}>
                <Text style={{ color: '#fff' }} onPress={() => this.setState({ isOpen: false })}>X</Text>
            </View>
        );
        return (
            <View style={styles.maincontainer}>
                <View style={styles.header}>
                    <Text style={styles.textHeader}>Daftar DesaKu</Text>
                    <TouchableOpacity onPress={() => this.signOut()}>
                    <Text style={styles.textHeader}>Logout</Text>
                    </TouchableOpacity>
                </View>
                <FlatList
                    data={this.state.data}
                    ItemSeparatorComponent={this.FlatListItemSeparator}
                    keyExtractor={item => item.toString()}
                    renderItem={this.renderItems}
                    ListEmptyComponent={this.ListEmptyView}
                    refreshControl={
                        <RefreshControl refreshing={this.state.refreshing}
                            onRefresh={this._onRefresh.bind(this)}
                        />
                    }

                />
                <ActionButton buttonColor="rgba(231,76,60,1)">
                    <ActionButton.Item buttonColor='#1abc9c' title="Add Daftar DesaKu" onPress={() => this.refs.modal3.open()}>
                        <Icon name="note-add" style={styles.actionButtonIcon} />
                    </ActionButton.Item>
                </ActionButton>


                <Modal style={[styles.modal, styles.modal3]} position={"center"} ref={"modal3"} isDisabled={this.state.isDisabled}>
                    <View>
                        <ScrollView>
                            <View style={styles.container}>
                                <TouchableOpacity onPress={this.selectPhotoTapped.bind(this)}>

                                    <View style={styles.ImageContainer}>

                                        {this.state.ImageSource === null ? <Text>Select a Photo</Text> :
                                            <Image style={styles.ImageContainer} source={this.state.ImageSource} />
                                        }

                                    </View>

                                </TouchableOpacity>


                                <TextInput

                                    placeholder="Masukan Nama Desa "

                                    onChangeText={data => this.setState({ nama_desaku: data })}

                                    underlineColorAndroid='transparent'

                                    style={styles.TextInputStyle}
                                />

                                <TextInput

                                    placeholder="Masukan Lokasi Desa "

                                    onChangeText={data => this.setState({ lokasi_desaku: data })}

                                    underlineColorAndroid='transparent'

                                    style={styles.TextInputStyle}
                                />

                                <TextInput

                                    placeholder="Masukan Lokasi Maps Desa "

                                    onChangeText={data => this.setState({ maps_desaku: data })}

                                    underlineColorAndroid='transparent'

                                    style={styles.TextInputStyle}
                                />

                                <TouchableOpacity onPress={this.uploadImageToServer} activeOpacity={0.6} style={styles.button} >

                                    <Text style={styles.TextStyle}> Upload Now </Text>

                                </TouchableOpacity>
                            </View>
                        </ScrollView>
                    </View>
                </Modal>

            </View>
        );
    }
}
Code Render dan Return
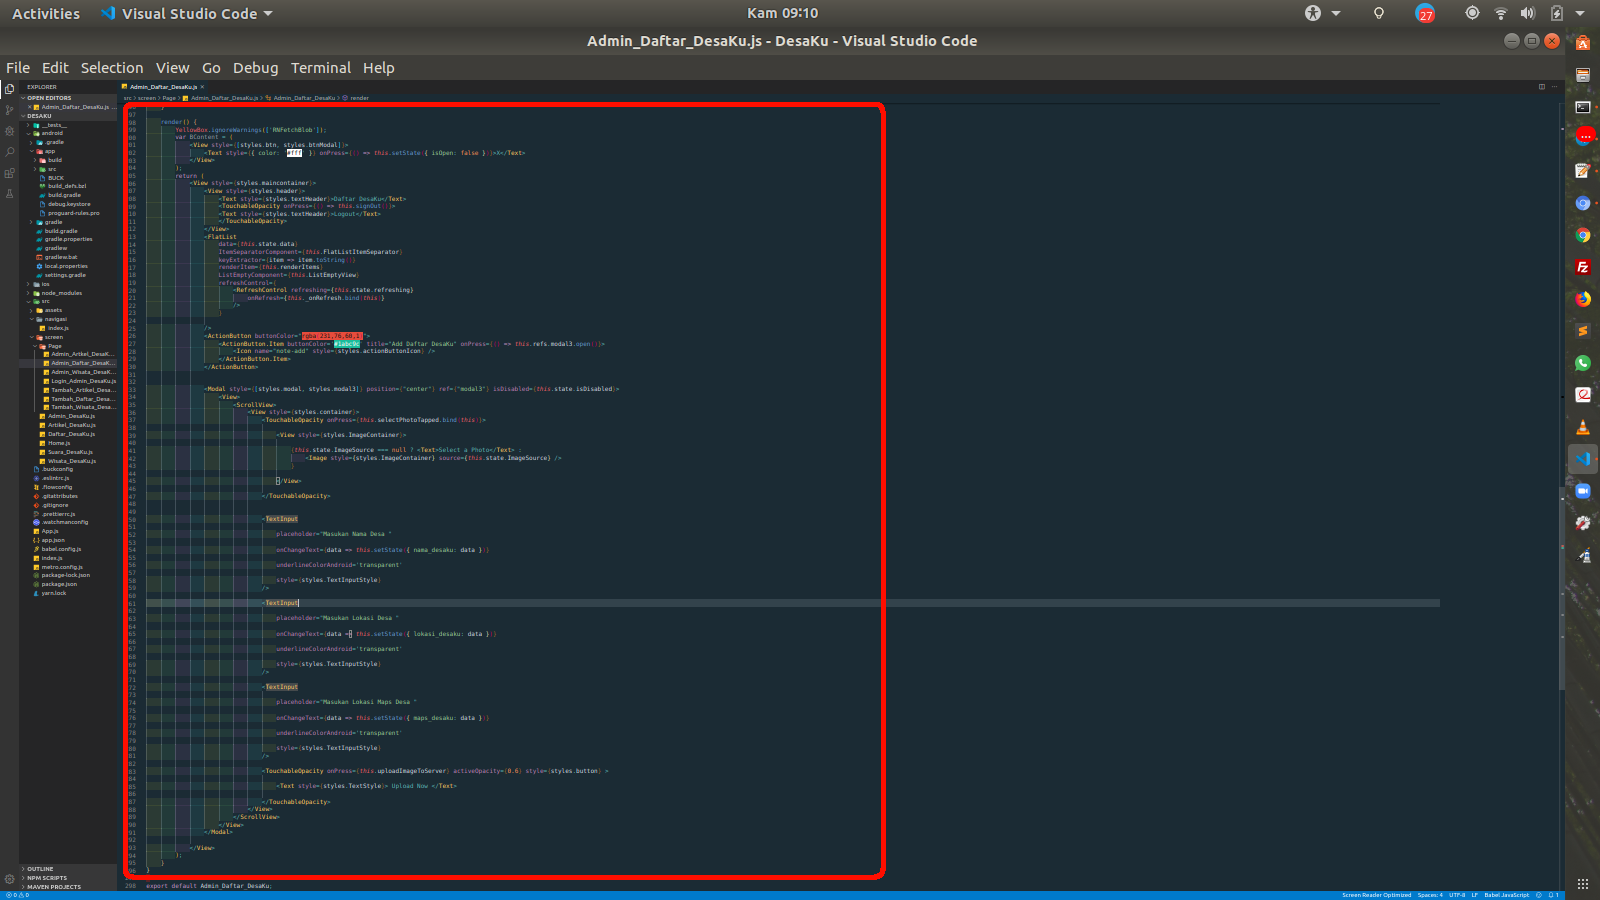
Code Render dan Return
selanjutnya tambahkan code styling berikut ini di variabel styles
const styles = StyleSheet.create({
    maincontainer: {
        flex: 1
    },

    containerList: {
        margin: 5,
        backgroundColor: '#009688',
        flexDirection: 'row',
        borderRadius: 15
    },

    gmbr: {
        height: 100,
        width: 100,
        resizeMode: "center",
        borderRadius: 20
    },
    conGambar: {
        alignItems: 'center',
        width: 120,
        justifyContent: 'center',
    },
    note: {
        width: 220,
    },
    Judul: {
        fontSize: 18,
        fontWeight: 'bold',
        color: '#fff'
    },
    tgl: {
        fontSize: 13,
        color: '#fff'
    },
    Title: {
        flexDirection: 'row',
        justifyContent: 'space-between'
    },
    jdlTitle: {
        fontSize: 20,
        fontWeight: 'bold'
    },
    header: {
        height: 40,
        width: '100%',
        backgroundColor: '#009688',
        alignItems: 'center',
        justifyContent: 'center',
        flexDirection: 'row',
        justifyContent: 'space-between',
    },
    textHeader: {
        fontSize: 20,
        color: '#fff',
        fontWeight: 'bold',
        marginLeft: 10,
        marginRight: 10
    },
    actionButtonIcon: {
        fontSize: 20,
        height: 22,
        color: 'white',
    },
    modal3: {
        flex: 1,
        backgroundColor: '#F0FFFF',
        marginTop: 10,
        marginBottom: 30,
        marginLeft: 5,
        marginRight: 10,
        width: '90%',
        borderRadius: 30
    },
    MainContainer: {
        alignItems: 'center',
        justifyContent: 'center'
    },
    container: {
        flex: 1,
        alignItems: 'center',
        paddingTop: 20
      },

      ImageContainer: {
        borderRadius: 10,
        width: 250,
        height: 250,
        borderColor: '#9B9B9B',
        borderWidth: 1 / PixelRatio.get(),
        justifyContent: 'center',
        alignItems: 'center',
        backgroundColor: '#CDDC39',

      },

      TextInputStyle: {

        textAlign: 'center',
        height: 40,
        width: '80%',
        borderRadius: 10,
        borderWidth: 1,
        borderColor: '#028b53',
        marginTop: 20
      },

      TextInputStyleDetail: {

        textAlign: 'center',
        height: 50,
        width: '80%',
        borderRadius: 10,
        borderWidth: 1,
        borderColor: '#028b53',
        marginTop: 20,
        flexWrap:'wrap'
      },

      button: {

        width: '80%',
        backgroundColor: '#00BCD4',
        borderRadius: 7,
        marginTop: 20
      },

      TextStyle: {
        color: '#fff',
        textAlign: 'center',
        padding: 10
      }
})
Styling
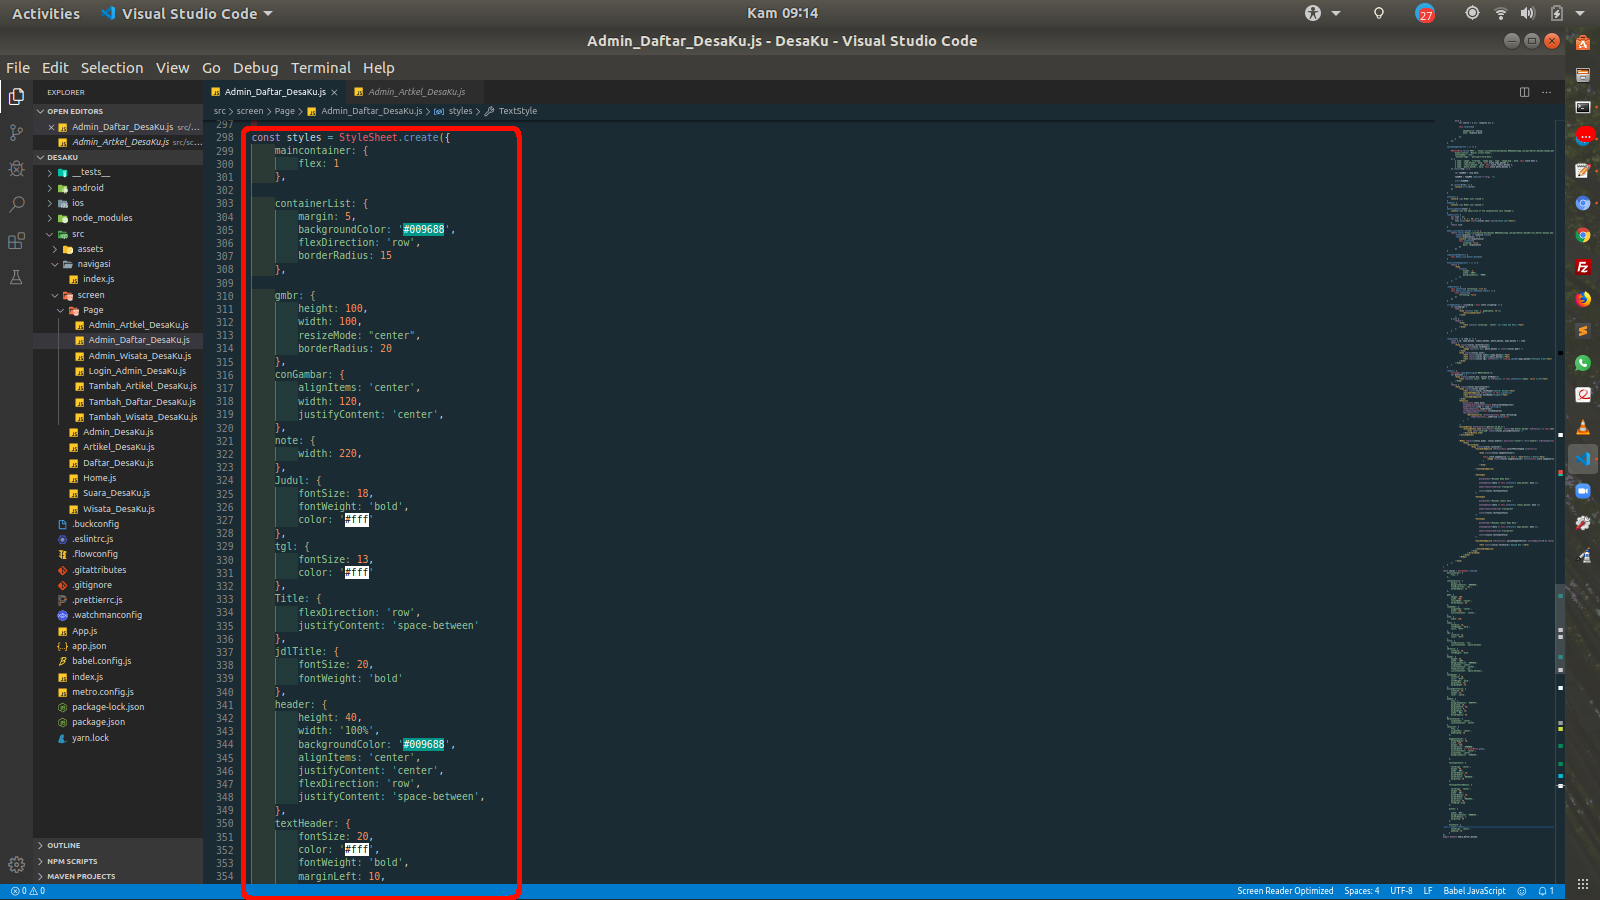
Awal Styling
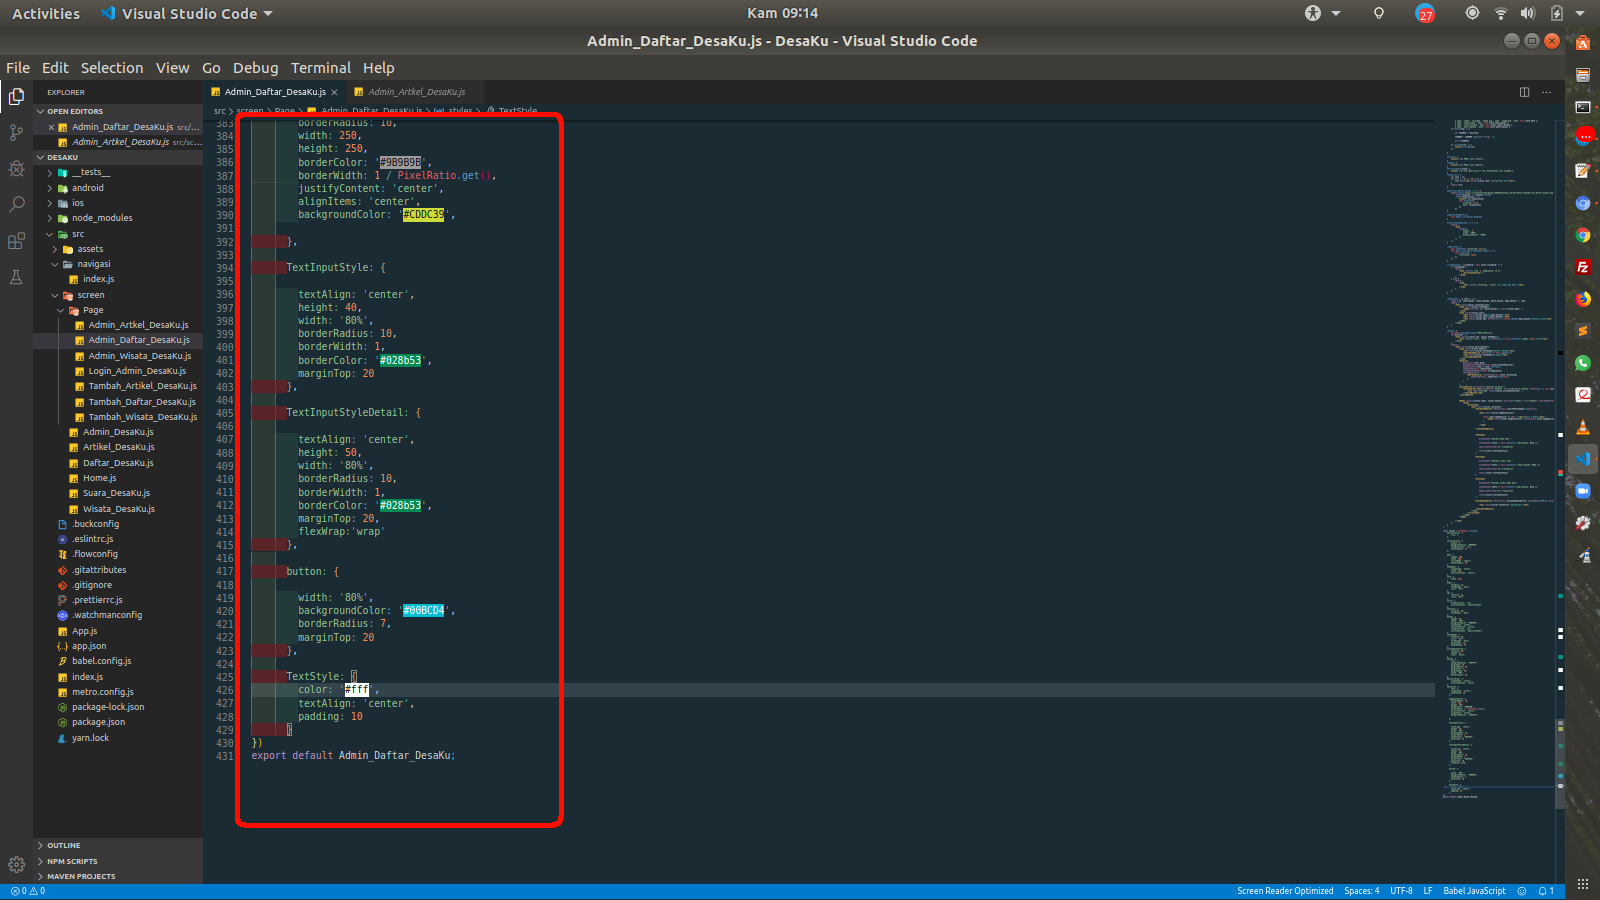
Akhir Styling
Jangan lupa buat folder uploads dan tambakan code pada file tambah_daftar_desaku.php yang berada di folder Daftar_DesaKu di web https://files.000webhost.com/
<?php
    //Define your host here.
    $hostname = "localhost";

    //Define your database User Name here.
    $username = "id11934325_desaku";

    //Define your database Password here.
    $password = "Mikrotik@122";

    //Define your Database Name here.
    $dbname = "id11934325_desaku";

    $conn = mysqli_connect($hostname, $username, $password, $dbname);

    //mysql_select_db($dbname, $conn);
    // Type your website name or domain name here.
    $domain_name = "https://sisteminformasidesaku.000webhostapp.com/api/Artikel_DesaKu" ;

    // Image uploading folder.
    $photo_desaku = "uploads/";

    // Generating random image name each time so image name will not be same .
    $photo_desaku = $photo_desaku . "/" .rand() . "_" . time() . ".jpeg";

    // Receiving image tag sent from application.
    $nama_desaku = $_POST["nama_desaku"];
    $lokasi_desaku = $_POST["lokasi_desaku"];
    $maps_desaku = $_POST["maps_desaku"];

     $CheckSQL = "SELECT * FROM Artikel_DesaKu WHERE nama_desaku='$nama_desaku'";
     // Executing SQL Query.
    $check = mysqli_fetch_array(mysqli_query($conn,$CheckSQL));

    // if( empty($nama_desaku) || empty($lokasi_desaku) || empty($maps_desaku)){
    //     $EmptyFormMessage = 'Pastikan Form Terisi...!';
    //     $EmptyFormJson = json_encode($EmptyFormMessage);
    //     echo $EmptyFormJson ;
    // }
    // else{

        if(isset($check)){
            $titleArtikelExistMSG = 'Data Sudah Ada !!!';

         // Converting the message into JSON format.
        $titleArtikelExistJson = json_encode($titleArtikelExistMSG);

        // Echo the message.
         echo $titleArtikelExistJson ;
        }else{
                // Receiving image sent from Application
    if(move_uploaded_file($_FILES['image']['tmp_name'], $photo_desaku)){

        // Adding domain name with image random name.
        $photo_desaku = $domain_name . $photo_desaku ;

        $Sql_Query = "insert into Artikel_DesaKu ( nama_desaku, lokasi_desaku, photo_desaku, penjelasan_artikel_desaku) VALUES('$nama_desaku' , '$lokasi_desaku', '$photo_desaku', '$maps_desaku')";


            if(mysqli_query($conn,$Sql_Query)){
                $MESSAGE = "Artikel Sukses Ditambahkan" ;
                echo json_encode($MESSAGE);
            }
            else{

             echo 'Please Try Again !!! ';


             }
             mysqli_close($conn);
    }
    }

        // }


?>
Berikut tampilan pada aplikasi nya
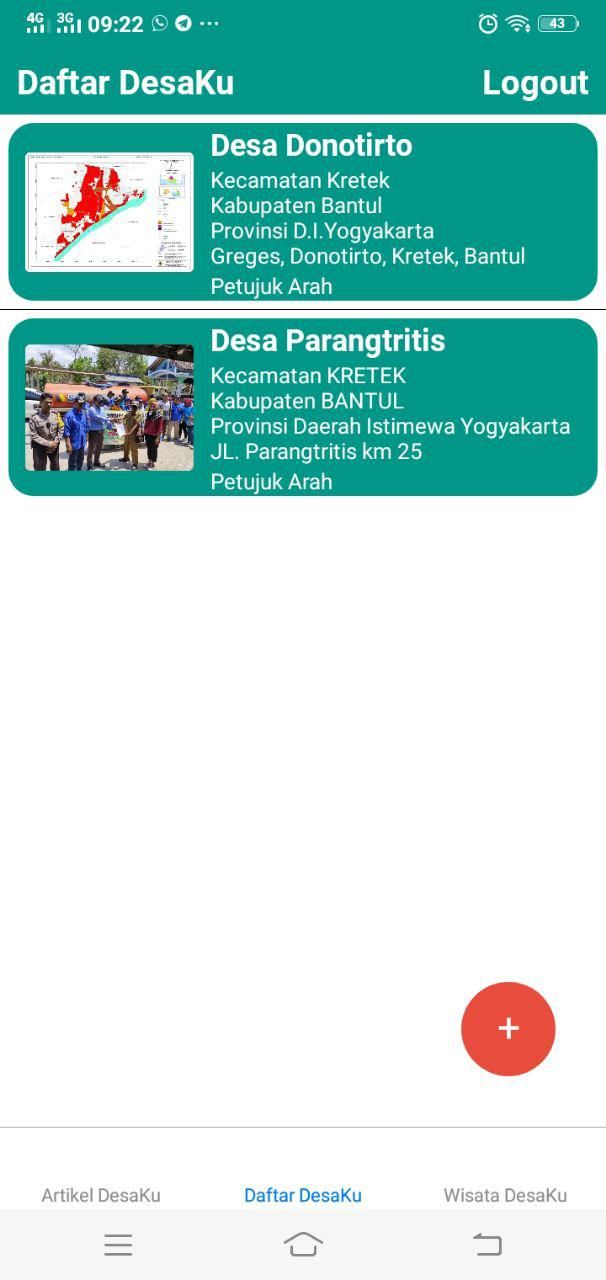
Daftar Artikel
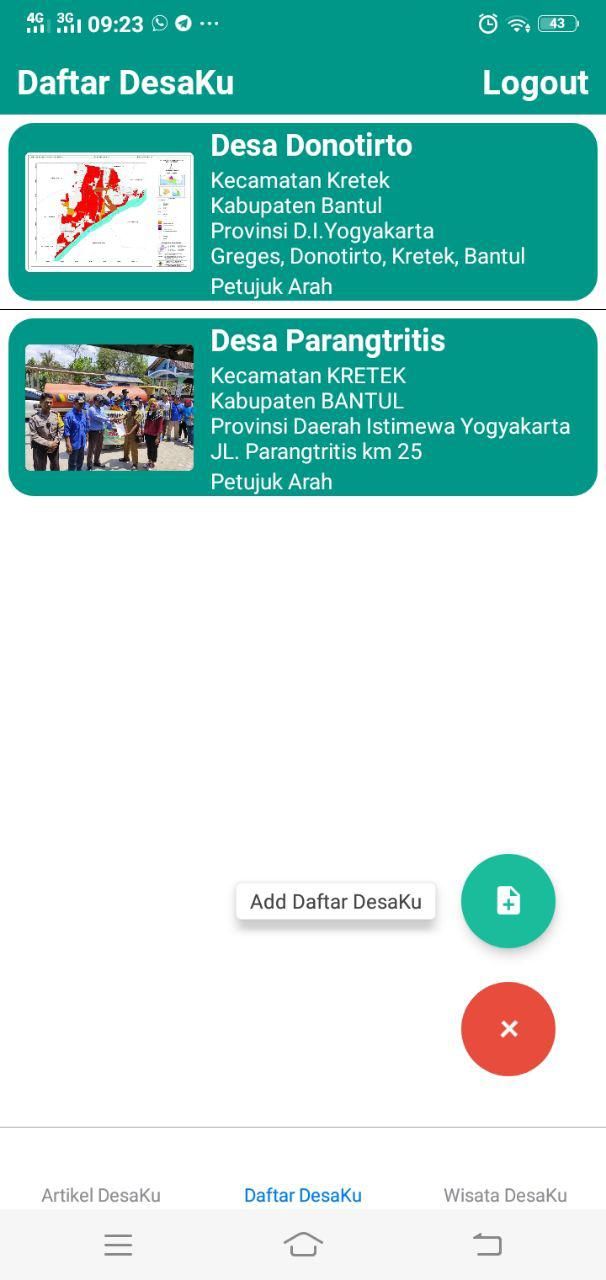
Button Add Daftar DesaKu
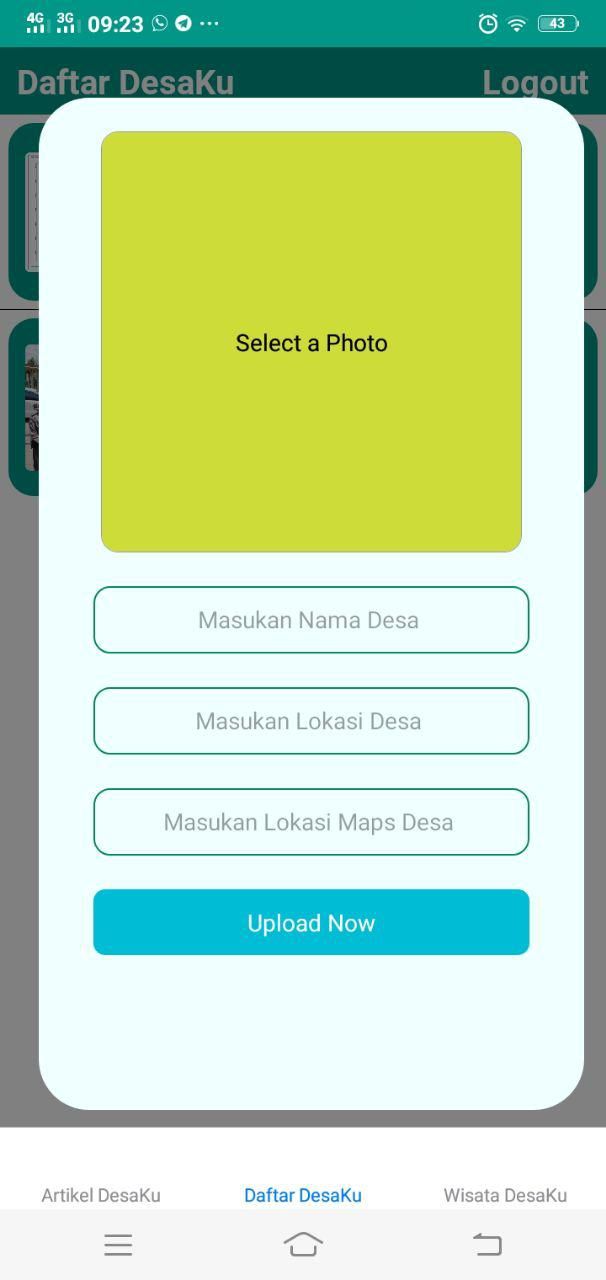
Form Add Daftar DesaKu
Demikian Tutorial Part 19 ini kita akan lanjutkan pada Tutorial Part 20
Catatan: tulisan ini dipindahkan dari cloudborneo.com, terbit pertama 19 Desember 2019.
Tentang penulis
Saya seorang Developer Mobile menggunakan Framework React Native dan saya juga memiliki pengalaman dibidang SYS Admin. Jasa menerima jasa pembuatan aplikasi dan website https://pindahdigital.com
Tulisan lainnya